Here it is folks! My (finally!!!) finished upgrade to my menu planning system. While I feel duty bound to admit this was a TON of work, I personally feel that it is sooo worth it! I love this new system!
Also I must apologize that it has not come sooner, I admit that I have had it done for about 2 weeks now. But I wanted to be sure it really worked and that I really liked it before I posted about it. So without further ado…..Menu Planning Part 2!
If you haven’t seen my post on Menu Planning Part 1, you may want to go back and read it. It will give you a bit more of a glimpse into my mental process and how much of a nerd I am when it comes to organizing!!
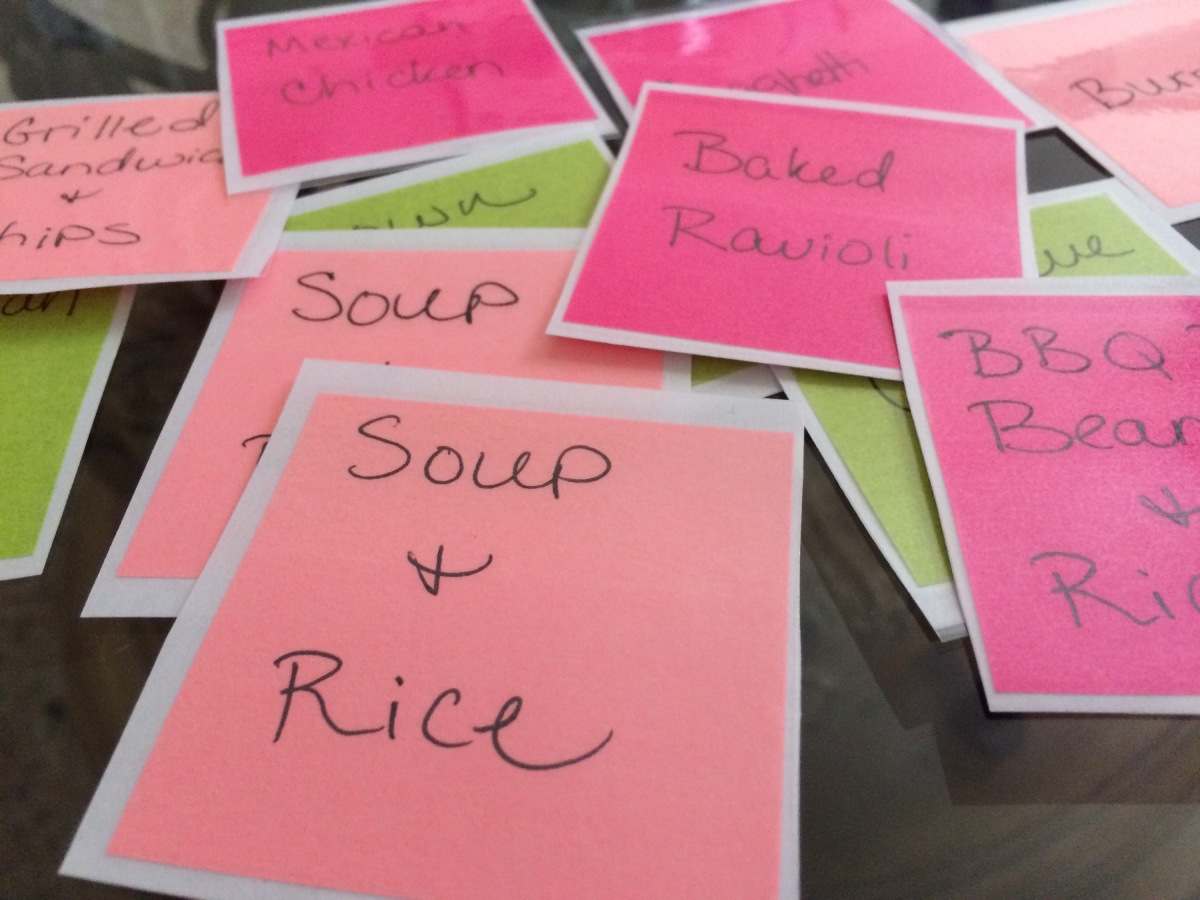
Step 1 was to make a complete list of all of the meals I would like to draw from when it comes to planning meals for the month. I took each of those meals and wrote them on a post it note, color coding light pink for quick and easy meals, hot pink for meals that require a bit more prep time, and green for crock pot meals, so that I can tell at a glance when I will need to start dinner each day.
Step 2: I took all of those post it notes, placed them on regular 8.5 X 11 paper and laminated them. This was probably admittedly my favorite part. I love laminating stuff! 😉

Step 3: The worst part, cutting all of the laminated post its apart. This took FOREVER! But once it was finally done, I was quite happy with them. 🙂
Step 4: Moving away from the meal cards, I created a list of meals I had included and the ingredients required for each. I got a little over eager about this and did those on laminated post its as well, though this would have worked just as well (probably better) just typed up on a piece of paper. I put the finished product in sheet protectors so I can put it in my meal binder for meal/shopping planning reference. Here’s how those turned out:

Step 5: I created a document with the days of the week going across and 2 rows for lunch and dinner (we don’t really do sit-down breakfasts). These squares are just big enough for the menu post its to fit in. I laminated these as well.


Step 6: I put magnets on the squares of the document, and magnets on the back of the meal post its. I plan my month by laying all of the meals out in front of me and adding them to the calendars (with the magnets) as I go. Since the calendars are laminated I can write what week they are for, and any special meals/events with a dry erase marker directly on the calendars. Then to create my shopping list I go through the calendar with the meals I’ve chosen, cross referencing the yellow post its I created earlier. I double check my cabinets and cross off anything I already have and then I’m ready to go! I keep the current week (or half of a week) on the fridge, and take off any meals we didn’t use (because of extra leftovers, eating out, etc.) and put them on the fridge directly above the calendar. That way if I want to switch out a meal later in the month, the meals that we have ingredients available for are already listed for me right on the fridge. It has worked out perfectly so far!
Here is the finished product:


So yes it was a ton of work! I went through several experimentations before I settled on exactly how I wanted to do it, which cost a lot of time and effort, and a little extra money that wasn’t necessary. But overall, I’m pretty happy with how they turned out! 🙂

So where are the veggies??? As your mother, I had to ask!
LikeLiked by 1 person
Haha ummmm the veggies are all automatic side dishes.
LikeLike
I think it looks great. No need to apologize for being organized. Ask your mom about the chore wheel we had on the fridge in college 🙂
LikeLike